Elle Magazine

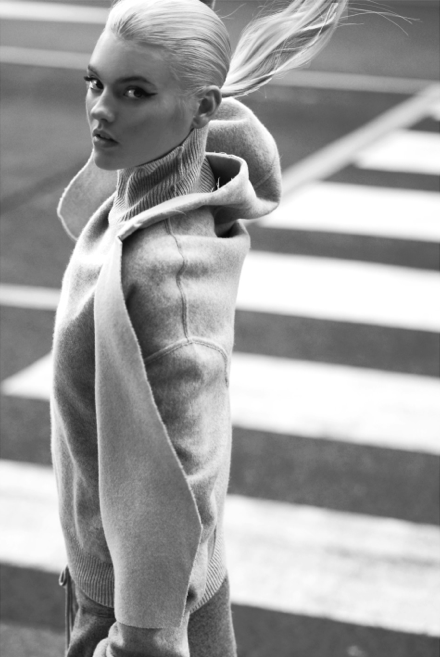
Dior Poison Campaign

Montana Cox for David Jones
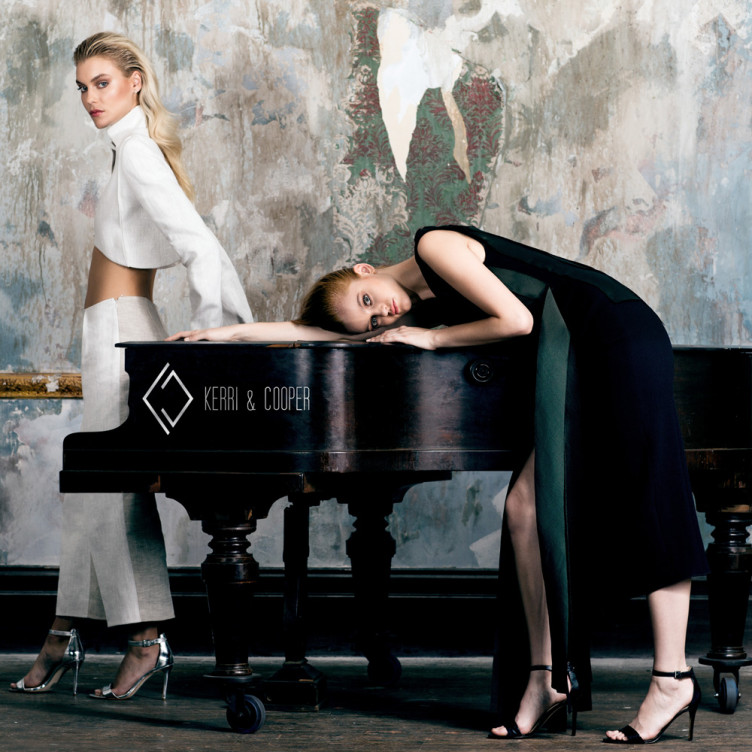
Kerri & Cooper Campaign
Margaret Zhang for Kerastase

With so much makeup advice out there, it can get overwhelming so I’ve rounded up a few basic tips on each aspect of your makeup to help with your every day application. You are welcome!
Primer
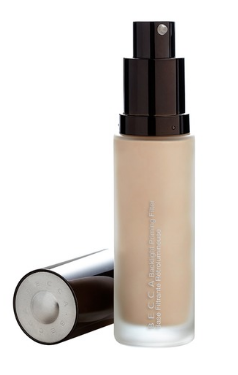
A primer is basically a silicone-based moisturizer; it puts a barrier in between your skin and foundation. Allowing smoother application and makeup longevity. Apply a small amount to lightly moisturized skin and leave for a minute or so before applying foundation. If your oily you can skip the moisturizer. I love Beccas ‘Backlight priming filter’ super sheer with a beautiful light reflecting sheen.
Foundation
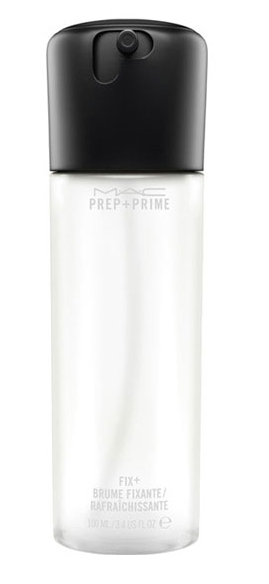
Always apply foundation before your concealer with the highest concentration of product to be in the center of the face and blended seamlessly out towards (but not in) the hairline. If you have applied too much foundation, use a damp beauty blender or spritz a skin mist over your foundation (MAC ‘fix plus’ is perfect for this) match your foundation to your chest (not jaw/neck/chin) you want your face and chest to match! Your foundation should melt into the skin not mask it!
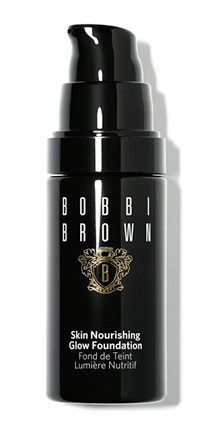
Yellow-based foundations tend to be more flattering, neutralising redness and reducing the risk of unsighly tide marks. if your super fair with pink undertones look out for neutral toned foundation. My Fav go to foundation atm is Bobbi Browns ‘Skin Nourishing glow foundation’ – its super hydrating and leaves skin looking flawless.
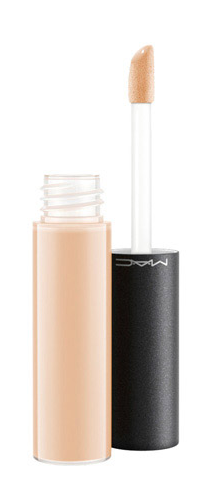
Concealer
Your concealer should be used sparingly to perfect the skin; your foundation should do all the heavy work! Your concealer should match your foundation, 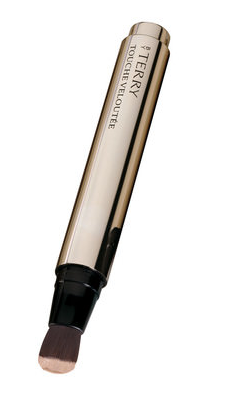 especially when concealing blemishes on the skin, using a lighter/darker concealer on blemishes will draw more attention to the area you are trying to hide!
I like to use a small eyeliner brush for precise application, thus ensuing that you are not over using the product. (set with powder). For oily skins use a more solid concealer – like Laura Mercier’s secret camouflage. For dry skins and for more delicate areas for example under eyes, use a more hydrating concealer like MAC ‘Moisturecover’ or By Terri Touché Veloutee – super hydrating, and light reflective – love!
Powder
A modern skin is a dewy skin, an over powdered face will look flat, embrace the natural sheen of your skin and only powder where necessary, like the T-zone. I like to use a small fluffy blending brush for this rather than a huge dome brush for a more controlled application. Use a translucent powder to set foundation, a pigmented powder will alter the colour of your base and will look too heavy.
Eyes
For longevity use a primer before your eye shadow, especially if you have oily lids. If you want to create a sexier smudgy look, go ahead and skip the primer, the natural oils in your lid can be used to melt the eye shadow onto your lids to give you more of a ‘lived-in’ look.
For a quick simple eye design, choose 2 colours one neutral and one slightly darker with a similar colour pallet (i.e. Taupe and brown). With your lighter neutral tone; apply a wash of colour all over the lid and up to the brow bone. Then with your darker tone, blend onto the outer ¼ of your eyelid and into the crease. (Or just outer ¼ if you don’t have a crease)
You can also use an angled brush & take the darker shade along the top lash line, hugging the lashes as you go so there is no exposed skin in between the shadow & the lash line.
Repeat on the bottom lash line, using slightly less product but only go ¼ of the along (no future than where your iris starts when looking directly at your self in the mirror) TOP TIP – You want the top lash line to be darker than the bottom lash line to create the illusion of thicker lashes.
Always curl lashes and apply mascara. I also love a lash primer; they thicken the lashes and help to curl even more. When applying mascara, work the base of the lashes in a zig-zag motion before pulling out through the lash to create maximum volume!
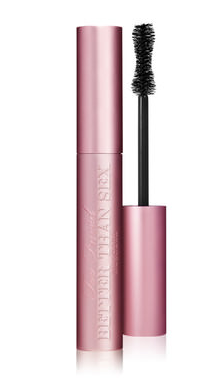
Flip your mascara wand vertically when applying mascara to the bottom lashes, using the tip of the wand to coat the lashes, this ensures no mascara touches your skin (hopefully) My current fav mascara is the ‘Better than sex’ mascara by Too Faced.
Brows
Grab a pencil or thin makeup brush and place vertically alongside of the bridge of your nose, (not the nostril) when it reaches your brow bone – this is ideally where your brow should start. Then look directly at in the mirror and place the pencil at the nostril and diagonally angle the pencil outwards towards the outer part of your eye lining up with the outer side of your iris – this is your highest point – the arch or the brow.
Then finally line your pencil up from the nostril angling diagonally towards and hitting the outer corner of your eye – your brow should ideally end here. Always use light feathery stroke when filling in your brows, and use a colour that is slightly lighter than your natural colour of your brows. I love a brow pen (Suquu do an amazing one) but eye shadow and angled  brush works well too.
Blush
What ever you do don’t smile and apply your blush, as soon as you drop the smile your blush will be in the wrong place. Blush applied too low will age you.
As a general rule blush should be applied along your cheekbone, but not to close to the eye, and no further in than where your pupil lines up when looking directly at your self in the mirror. Obviously different face shapes need a different application; Apply to the apples of your cheeks if you have a Square shaped face.
For heart shaped faces apply blush along the bottom half of your cheekbones, lightly catching the cheekbone itself to soften. The same goes for rounder faces, making sure you don’t catch the apples of your cheeks. Oval shape faces can pretty much get away with anything; most flattering is to apply your blush the top of your cheekbones, blending towards the ears.
Bronzer
Bronzer should be used too give you a warm healthy glow, don’t apply your bronzer all over your face. Sun kissed skin is the goal, apply where the sun would naturally hit your face; Top of forehead, bridge of nose and lightly over the cheeks – use a big brush and use this products sparingly!
Contour and highlight
Unless you are being photographed or you are in fact Kim Kardashion, a heavily contoured face doesn’t look great in real life, soft subtle contouring can be used to shape and enhance your natural features. Light colours will bring features forward (highlighter) and dark will push features back (contouring) use this rule when sculpting your cheekbones.
Keep it simple, for contouring using a powder 1-2 shades darker than your skin, apply under your cheekbones, at the temple’s, apply along the jawline – only is you have a square jaw, and if you have a larger forehead, the dust across the top. Highlighter is your contours BFF so apply your highlight on top of your cheekbones, inner corner of eye, cupids bow and if you don’t have a very heavy eyelid then you can apply under the arch or your brow.
Just remember it’s only makeup – it washes off!
SMA xx
Photography // Victor Low
Model // Kat @ priscillas
Hair & Makeup // Nicola Johnson